
How will I Keep JavaScript Code Quality High (JSHint)
1st Jul 2013
On starting a new project recently I started making notes on the kind of questions I would want to ask myself at the beginning of every project. I started writing them down and making notes around each one but the article has become a little large so I'm going to do a series instead.
JavaScript Code Quality and JsHint
I'm going to start off looking at JavaScript, in fact more specifically for this article JsHint.
Going in to a build is a mine-field. Requirements, specifications, current trends and new technologies, it's no wonder a lot of projects only begin to consider code quality and maintainability half way through a build. However integrating a few tools and habits in to the workflow of a project right at the beginning will mean that it can be easier to maintain a good quality of code.
JsHint
JsHint is a community-driven tool to detect errors in JavaScript code and enforce your team's coding conventions. It is a fork of Douglas Crockford's JsLint that has softened some of the more personal expectations and made it more configurable.
1. Add a .jshintrc file in to the root of your project.
This can then be used by editors and automation and is a much more convenient place to configure the expectations of JavaScript code. Here is an example file:
{
  "strict": true,
  "browser": true,

  "eqeqeq": true,
  "immed": true,
  "newcap": true,

  "maxparams": 4,
  "maxdepth": 4,
  "maxstatements": 15,
  "maxcomplexity": 6

}
A complete list of options can be found in the JsHint Docs
This configuration can then be used by jshint when checking your code.
2. Use the max... options from the beginning
JsHint includes a few really useful options to help you write code which is easy to follow. I would recommend these are used from the beginning.
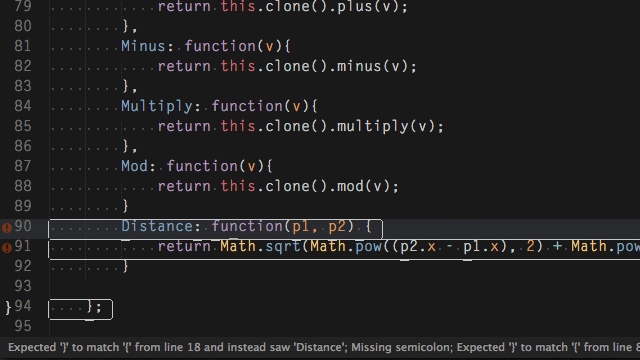
maxparams
This option lets you set the max number of formal parameters allowed per function. You really should go for an key/value object if there are more than 3 or 4 parameters. The key thing here is to prevent yourself getting in to the boolean trap of seeing functions like this:
myFunc(true, true, false, 'yes', false, true);
This is extremely hard to follow unless you know the code inside out.
maxdepth
This option lets you control how nested you want your blocks to be. Again I would tend to limit this to 3 or 4 as code starts to get pretty confusing after that.
maxstatements
This option lets you set the max number of statements allowed per function. It's a way of preventing monolithic functions that go on forever. It's good practice for the entire function to be visible on the screen while developing. You'll need to find what suits you but anything from 8-15 should be reasonable.
maxcomplexity
This option lets you control cyclomatic complexity throughout your code. Cyclomatic complexity measures the number of linearly independent paths through a program's source code. Read more about cyclomatic complexity on Wikipedia. I have found a value of 6 gives a good balance of separation and being pragmatic.
For further reading Elijah Manor has got a more in depth write up of these.
3. Integrating checks in to your workflow
You have a few options for doing the checks on your code.
Inside your editor
A lot of editors include baked in support or support via a plugin which will highlight errors as you develop. The integration will be different for each and there are some links to various install instructions on the jshint website
Using the command-line tools
It's really simple to get started using JSHint on the command line. It only relies on you having installed Node.js which is pretty painless if you haven't.
To install it globally use npm from the command line
$ npm install jshint -g
After that you should be able to point it at a JavaScript file and get a result
$ jshint myfile.js
If your myfile.js is in a child (or same) directory of your .jshintrc file which we created earlier jshint will use that file as your configuration options.
More options are available on the JSHint docs
Using grunt
Grunt is a JavaScript task runner. JSHint can be included in the automation flow. Errors can fail a build or be flagged for later.
You include it in your project (which should be already set up to use grunt) with the following npm command.
npm install grunt-contrib-jshint --save-dev
And to utilise the .jshintrc file which we created earlier make sure they are both in the root of your project and include a jshint configuration section in your Gruntfile.js similar to:
// Project configuration.
grunt.initConfig({
  jshint: {
    options : {
      jshintrc : '.jshintrc'
    },
    all: [
      'Gruntfile.js',
      'scripts/**/*.js',
      'test/**/*.js'
    ]
  }
});
More options and examples can be found on the grunt-contrib-jshint project page.