Presenting Adventures in HTML5 Games, AKQA Anoraks
25th Mar 2013

In this series:
I had the pleasure of presenting at AKQA Anoraks in London on thursday. It was a great packed evening. I gave a talk on my adventure over the last few months of building my simple Space Invaders game. Even though it's a pretty simple game I have learnt enough to talk about it or half an hour.
Key Points
I broke the process down in to 3 key concepts:
Frame
I think of this like a controller. It's made up of at least two timing loops, the first for game logic, and the second for drawing.
Timing loops for the game logic are created and you want to assess the current state of your game and react to input as close to 60 frames per second as possible. For this we will want to use a self calling function triggered by setTimeout. You may be thinking why not requestAnimationFrame? It'll become clearer as we look at what requestAnimationFrame is designed for and some of the conflicting functionality with what you want to do with a logic frame.
It might look similar to this:
function logicFrame(){
  // update players position,
  // listen for collisions etc

  // process the game logic at a target of 60fps
  setTimeout(logicFrame, 1000/60);
}
Timing loops are also needed for the drawing. They work in a very similar way, in fact so similar that I made the initial mistake of using a single loop encompassing both.
It might look similar to this:
function drawFrame(){
  // kick ass circles and squares

  window.requestAnimationFrame(drawFrame);
}
The key difference here is the fact that we are using a fairly new JavaScript API requestAnimationFrame. The browser vendors saw that setTimeout was being used for animation loops and thought "Why don't we optimise that". So they built this API in which the browser can optimise concurrent animations in to a single reflow and repaint cycle. It also synchronises with the screen's refresh rate to reduce the jitter which can be seen when the setTimeout trigger just misses the screen refresh and skips a frame.
It also includes optimisations which are designed to increase battery life which mean that the frame will not trigger when the tab is not visible. This is the main reason we need separate logic and draw timing cycles.
- Paul Irish has written a good article on
requestAnimationFramewhich is worth a read. - Article on Creative JS
- Nicholas Zakas article
Step
The second key concept is the step, which I imagine as a commander. It's essentially the code which happens during each frame. Taking the interactions and applying time based logic like moving a ship or firing a bullet.
The objects used are much the same as you would see in any other model, they have properties and they can perform actions. Here is an overview of the Ship object.
function Ship(){...}
Ship.prototype = {

  // we need to be able to position it
  x:0, y:0, w:28, h:16

  // it needs to do stuff
  shoot: function(){...}
  jumpLeft: function(){...}
  jumpRight: function(){...}

  // we need to see it
  draw: function(){
    this.sprite.draw(0, this.x, this.y);
  }
};
As you can see, it needs state to know where it is currently positioned but it can also perform actions like shoot and jumpLeft. All we are doing during this step is updating state across all the different objects on our stage.
Collisions
Collisions were the biggest learning curve and can be an utter headache. It's a massive subject but here are a few gems which aren't immediately obvious.
Trig
The option I ended up using in the Space Invaders game was to simply use a bit of Trigonometry. In the logic frame I knew the x/y coordinates of the bullet and I knew the x/y coordinates of the Invader so I simply measured the distance and set isHit if it was less than a certain amount.
Here's a simplified version of the code (notice the checkHit function):
function Invader(){...}
Invader.prototype = {

  // we need to be able to position it
  x:0, y:0, w:28, h:16,

  // how eeeeeeevil is this invader?
  isHit: false, // not at all if it's hit
  points: 10,   // more points for tougher invaders

  // it needs to do stuff
  checkHit: function(x, y){
    if (distance(this.x, this.y, x, y) < 10){
      this.isHit = true; // KAPOOOOOWWWWW
    }
  },

  // we need to see it
  draw: function(){
    this.sprite.draw(0, this.x, this.y);
  }
};
Grid
Another option is to split your stage up in to a grid and only allow a single object to fill each square. When objects move they will always be moved to a particular coordinate within this grid. If there is already an object within that box then you get a hit.
Hit Map

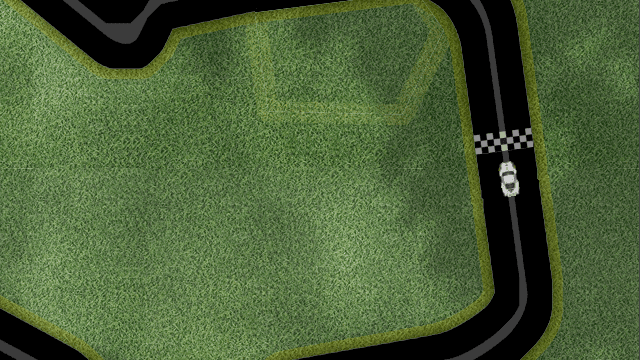
I've already written about using a hit map with canvas in my recent article on a simple HTML5 Racer so take a look for more info on this.
There are obviously more options to you, this subject is pretty massive but hopefully this provides a good starting point to thinking about collisions.
Draw
The biggest mindset switch comes when you start thinking of the draw step much like a still life painter. All it is doing is taking a snapshot of time looking though all the objects on stage and painting their current state on to the canvas. The main difference is that this refreshes rapidly (hopefully at around 60fps) and so becomes alive.
Here are a few canvas basics.
Add the canvas element to the stage
<canvas id="canvas" width="500" height="500"></canvas>
Use the 2d context for this style of game
var canvas = document.getElementById('canvas'),
  context = canvas.getContext('2d')
;
Then with that context you can do some drawing
context.clearRect(0, 0, w, h);
context.fillStyle = '#000';
context.fillRect(0,0,w,h);
2d games love sprites and I've written a post looking closer at sprites on canvas.
Slides
You can take a look at the slides.
Your challenge
This is very much a work in progress but I hope it inspires you to give it a go. Give me a shout if you want chat things through or need to tell me (graciously) that I've got something horribly wrong.